JS: Creating a map app using Openlayers with a dockerized maptile server
Openlayers is a popular Javascript package that allows developers to create interactive map apps. It offers APIs that can make requests to the GIS resources and render fetched data on client’s browser. Normally, GIS servers offer services such as WMS, WMTS, or WFS. The package’s APIs offer corresponding ways to parse data from these different services to display GIS information. In this article, I’ll create a map app that utilizes some of the capabilities in the package. You can find the official documentation here. https://openlayers.org/en/latest/apidoc/
I’ll create a npm project to manage the project’s dependencies. Firstly, let’s add Openlayers as dependency and parcel as dev dependency.
npm install ol
npm install -D parcel-bundler
Next, add a start script in package.json to use parcel to bundle our codes and run development server.
Next, create an index.html file to host the map. We do not need to add any markups in the html after this. All of our codes will be in Javascript from now on.
index.html
<!DOCTYPE html>
<html lang="en">
<head>
    <meta charset="UTF-8">
    <meta name="viewport" content="width=device-width, initial-scale=1.0">
    <title>Document</title>
</head>
<style>
    #map {
      width: 100%;
      height: 500px;
    }
  </style>
<body>
    <div id="map"></div>
    <script src="./index.js"></script>
</body>
</html>
Add index.js file for the project’s main entry js. For simplicity, we will initiate an Openlayers Map instance in this file and start with two layers. Layers are basic units that can be rendered onto the map.
index.js
import { Map, View } from 'ol';
import TileLayer from 'ol/layer/Tile';
import OSM from 'ol/source/OSM';
import * as Proj from "ol/proj";

import landLayer from './xyzLayer';

const baseLayer = new TileLayer({
    source: new OSM()
});

const map = new Map({
    target: 'map',
    layers: [
        baseLayer,
        landLayer
    ],
    view: new View({
        center: Proj.fromLonLat([121.21284029065943, 25.011669772542394]),
        zoom: 17,
        minZoom: 6,
        maxZoom: 19
    })
});
Notice in line 8 of index.js, we added a new TileLayer instance with source from OSM (Open Street Map). In line 12, we initiate the map instance and keep a reference to the object in variable map. This will help us interact with the map using the variable later on.
Also, we imported landLayer from another js file called xyzLayer. This object is another TileLayer with a different source provider, in this case, an XYZ source. This basically allows map to resolve the exact map tile (png files essentially) based on the user’s current zoom and x-y coordinates.
xyzLayer.js
import TileLayer from 'ol/layer/Tile';
import XYZ from 'ol/source/XYZ';

const dockerCDN = "http://localhost:1235/assets/tiles";

const areaExtents = [13488197.50506056, 2874713.885244023, 13496562.320206212, 2880071.653151566];

const landLayer = new TileLayer({
    extent: areaExtents,
    source: new XYZ({
        url: `${dockerCDN}/{z}/{x}/{y}.png`,
    }),
});

export default landLayer;
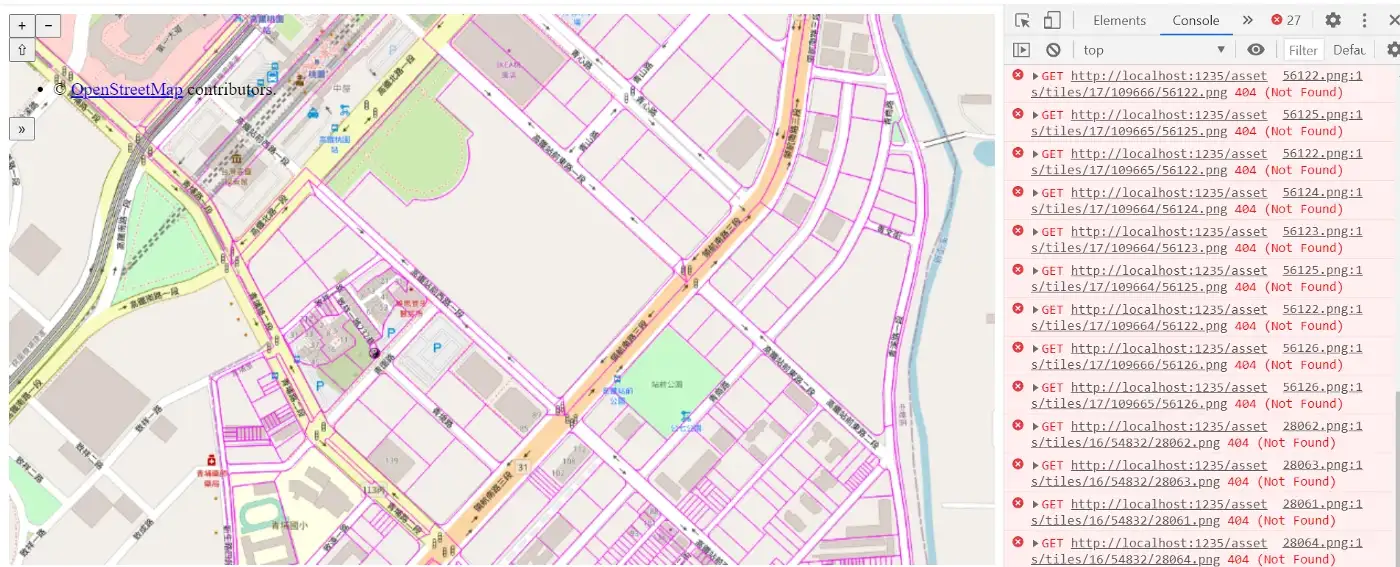
Notice in line 6 of xyzLayer.js, I have added an array of coordinates (lower-left x-y and upper-right x-y) and stored the array in variable areaExtents. It is to provide additional options value when we initialized our xyz sourced tile. The extent array provides a boundary for which the tile object needs to query.
Turn on the console of the browser and you will find that it logs lots of unfounded png. This is because I did not have all the tiles that could be provided for downloading. In fact, the xyz source tiles that I included in the project are not much further than couples of blocks in my home town!
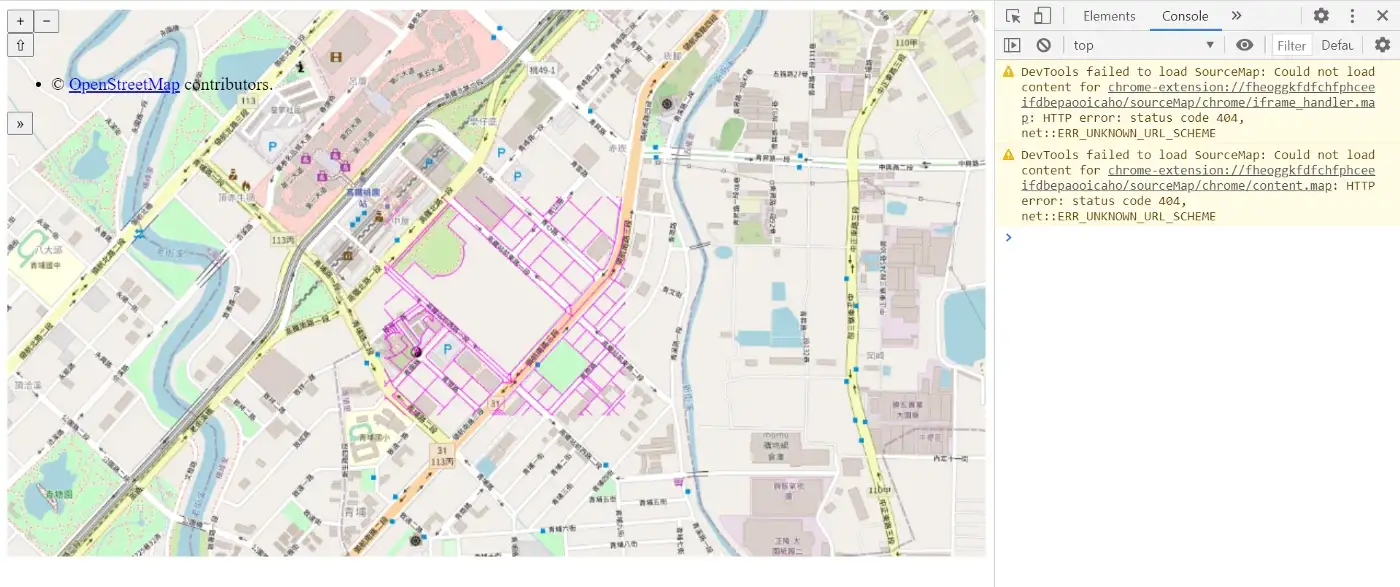
The smaller the extent, the less files xyz source will try to resolve. If we shrink the extent further, we could reach a point where we no longer see 404 in our console log. Of course, this really depends on the amount of information available for the user. Try use a really small extent such as the following. You’ll see our xyz tile is limited to a small box.
const areaExtents = [13493562.418760775, 2876699.7234530193, 13494302.859017791, 2877375.924600978];
Lastly, I used docker container (a nginx web server)to host the xyz tile png files. The following snippets are the Dockerfile and nginx conf file in use.
Dockerfile
FROM nginx:alpine

# RUN rm /etc/nginx/conf.d/default.conf
RUN mkdir /src
COPY index.html /src/index.html
COPY nginx.conf /etc/nginx/conf.d
ADD /tiles/ /src/assets/tiles/

EXPOSE 1235

CMD ["nginx", "-g", "daemon off;"]
nginx.conf
server {
    listen 1235;
    listen [::]:1235;

    server_name tileserver localhost;

    root /src;
    index index.html;

    location /assets/ {
        alias /src/assets/;
    }

}
In the Dockerfile, I just copied the static resources such as html and tile image files to the specific location in the container.
In the web server configuration file, there is the url alias for our tile resources (with the physical location in /src/assets/ inside the container.
That is it. We just created an app featuring a docker container maptile server.
The source code is located in github: https://github.com/mikeliaohm/openlayers-app.git